

3d Print Designs And Files
When you are in the field of 3D printing, there are steps you have to follow to be able to actually 3D print your objects. Many steps are done for you but making 3D printer files is one of the most important ones. This article will show you exactly how 3D printer files are made so read on if you'd like to know.
3D printer files are made by using Computer Aided Model (CAD) software which allows you to create what your model will look like. After your model is complete, you need to 'slice' your CAD file in a slicer program, the most popular being Cura. After your model is sliced, it will be ready for 3D printing.
Once you understand the steps of this process and do it for yourself, it all becomes very easy and clear. I will do my best to detail the step-by-step process on how beginners create 3D printer files.
Creating models for 3D printing and learning how to make your own 3D model is a great skill to learn, so let's get right into it.
What is the Step-By-Step Process to Create 3D Printer Files?
- Choose & open a CAD program
- Create a design or model using the tools in your chosen program
- Save & export your completed design to your computer (STL file)
- Choose a slicer program – Cura for beginners
- Open & 'Slice' your file with your desired settings into a G-Code File
Choose & Open a CAD Program
There are many CAD programs out there that can be used to create your model, but some are definitely more tiered towards beginners which is what I'll focus on in this article. Also, many higher level programs actually need to be purchased, so you'll be happy to know everything I recommend will be completely free.
The best CAD programs for beginners are:
- TinkerCAD – click and create your own account
- Sketch Up
- FreeCAD
- Onshape
The one that I will focus on and do recommend is TinkerCAD for beginners because it was definitely designed for you guys in mind. Beginners don't want a complicated CAD program that takes a while getting used to, they want to be able to put something together in the first 5 minutes and see its capabilities.
One of the great features of TinkerCAD is the fact that it's browser-based so you don't have to install some huge program file to get started. Just go to TinkerCAD, create an account, go through the short tutorial on the platform and get to modeling.
Once you get the hang of one CAD program and the way designing a model works, you can move onto other programs, but at first just stick to one simple program.
TinkerCAD has enough capabilities to keep you modeling there for at least a few months, before you think about moving to a software with more features. For now, it will work wonders!
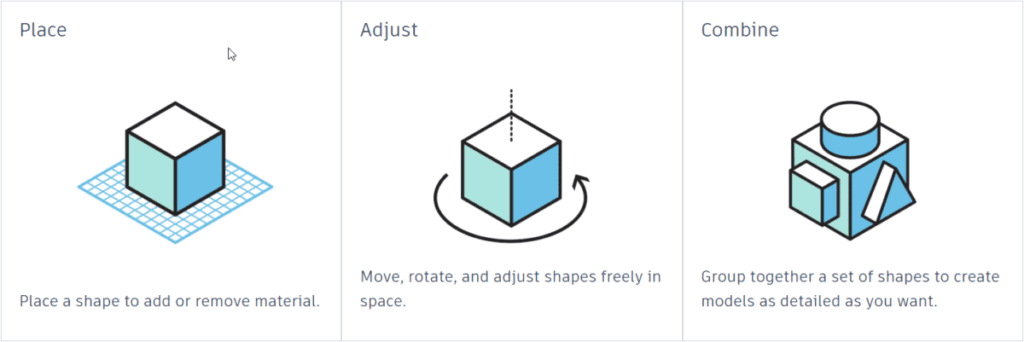
Create A Design Using the Tools in Your Chosen Program
TinkerCAD specializes in ease of use, as you put together blocks and shapes to gradually build a more complex structure that you can be proud of. The video below will show you a quick tutorial on exactly how it looks and how it's done.
It's always best to follow a video tutorial when learning how to create designs, while doing the same thing in the program yourself.
Reading a guide of some sort is great when you understand the program and are looking for ways to do cool, new things but when just starting out, get the experience behind you.
Once you've created some of your own models by following a tutorial, a good point to go to next is to play around in the program and get creative. One thing I chose to do is find a few household objects and try to model it as best as I could.
This ranged from cups, bottles, small boxes, vitamin containers, anything really. If you want to get really accurate, you can get a sweet pair of Calipers from Amazon.
If you want a quick, cheap but reliable set I'd recommend the Sangabery Digital Caliper.

It has four measuring modes, two unit conversion & zero setting function. You can get very accurate readings with this device, so I do recommend you getting one if you don't already. Also comes with two spare batteries!
If you want a higher quality Caliper, go for the Rexbeti Stainless Steel Digital Caliper. It is more premium with a polished finish and a case to hold the device. It comes with IP54 water & dust protection, has 0.02mm accuracy and is great for the long-run.

Once you get some good practice creating different items, you'll be a lot more prepared to start making useful and complex 3D printer files.
At first, it seems like all these simple shapes and holes won't be able to make much. This is what I thought at first before seeing what people could really create in this software.
The following was made on TinkerCAD by Delta666 found on MyMiniFactory. It would be hard to describe this as a simple design, which just goes to show you the potential you could have with designing your own 3D printer files.

Save & Export Your Completed Design to Your Computer (STL File)
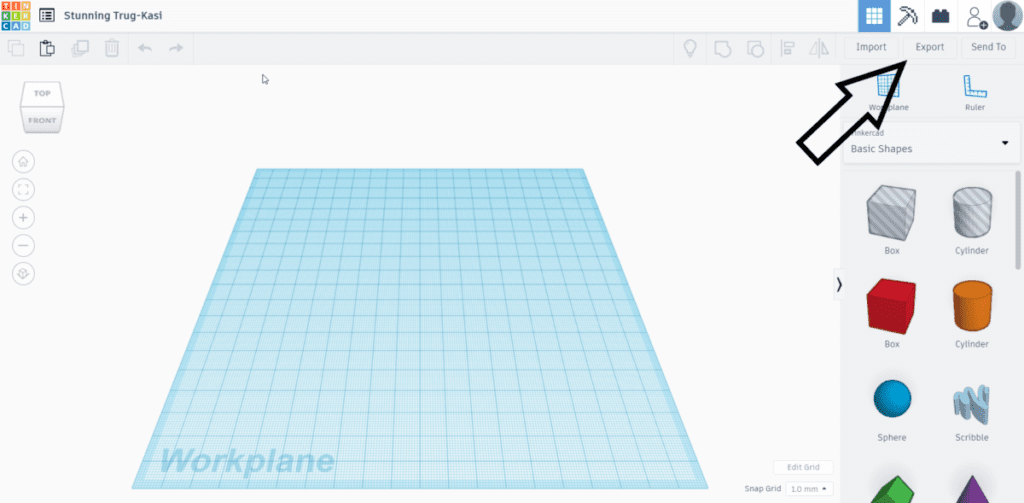
The great thing about TinkerCAD is how it's made for things to be easy to use. This also includes saving and exporting your STL files straight to your computer. Unlike some downloaded CAD software, this one auto-saves your work each change you make so you don't have to worry about losing your work.
As long as you have named your work in the top left, it should continue to save. You'll see a small message saying 'All Changes Saved' so you know if it's working.
As you can see in the picture, exporting your CAD files into a downloadable STL file is a piece of cake. Simply click the 'Export' button in the top right of your TinkerCAD page and a box will pop up with a few options.
When it comes to 3D printing files, the most common ones we see are the .STL files. There are a few things that people say it's abbreviated from such as Stereolithography, Standard Triangle Language and Standard Tessellation Language. Either way, we just know it works pretty good!
The complex part behind STL files is that they are made up of several tiny triangles, with more detailed parts having more triangles. The reason behind this is 3D printers can better understand this information with this simple geometric shape.
Below is a clear illustration of these triangles making up a model.

Choose a Slicer Program – Cura for Beginners
If you're in the 3D printing field, you either would have come across Cura by Ultimaker or are already well-versed in the program. Cura is the most popular, cross-platform slicing software that 3D printer hobbyists use to prepare their files for 3D printing.
There isn't much point trying to go with another slicer because this one works so well and does exactly what you need it to do. It's very beginner-friendly and doesn't take long at all to get the hang of it.
There are other slicer programs out there, some even dedicated to specific 3D printers like PrusaSlicer or ChiTuBox. They all essentially do the same thing but Cura is the choice I recommend.
Open & 'Slice' Your File With Your Desired Settings Into a G-Code File
The term 'slice' your file is one that is widely used in the 3D printing field which means to prepare your CAD model and turn it into a G-code file which 3D printers can make use of. G-code is basically a series of commands that tell your 3D printer what to do, from movement, to temperatures, to fan speed.
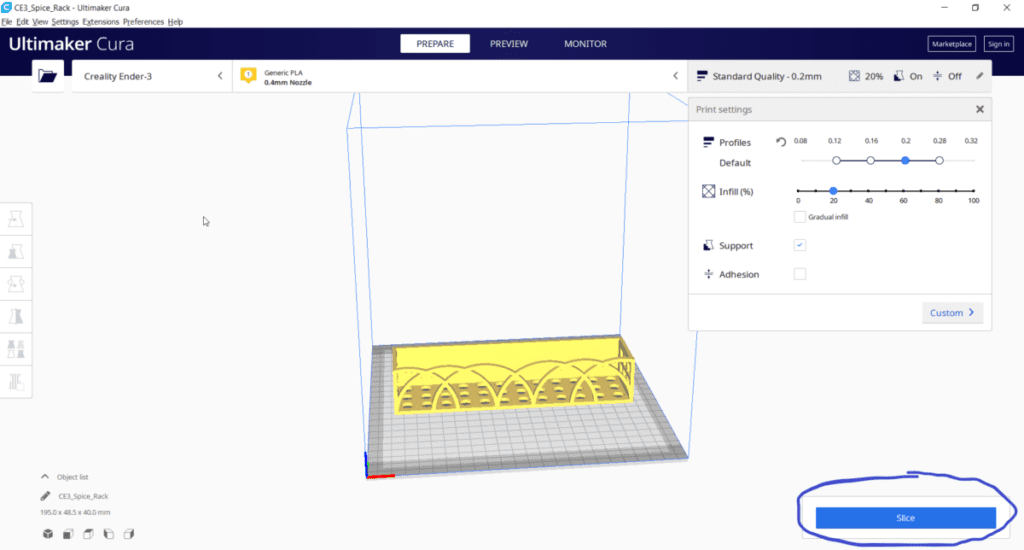
When you slice your file, there is a certain function where you can preview your model in its 3D printing form. This is where you view each layer of your 3D print from the ground, up and you can even see the direction your print head will go while in the printing process.
It really isn't as complicated as it looks. All it really takes is looking over the settings and hitting the blue 'Slice' button on the bottom right of the program. The box to the top right shows a simplified way to change settings without getting into all the specific settings.
There are many settings in your slicer you can take control of such as:
- Print speed
- Nozzle temperature
- Bed temperature
- Retraction settings
- Print order prioritization
- Cooling fan settings
- Infill percentage
- Infill pattern
Now just because it isn't complicated to get started doesn't it mean it can't get as complicated as you'd like it. I'm sure there are settings that Cura experts have never thought about touching.
This really is a short list when you have seen just how many settings there are, but luckily, you don't have to worry about most of the settings. Cura has default 'profiles' which give you a list of already done for you settings that you can input.
This profile usually works great by itself, but it can take a little tweaking on the nozzle & bed temperature before you get some great prints.
There is a cool menu which allows users to choose custom setting views for beginners to masters, down to custom so the functionality and ease of use is great.

After you follow all these steps, you'll have created your 3D printer file which your printer can understand. Once I've sliced a model, I simply get my USB drive and micro SD card which came with my Ender 3, plug it into my laptop and select the 'Save to Removable Device' button and Voilà!
I hope these steps were easy to follow and help you get started making your own 3D printer files.
It's an amazing skill being able to design your own objects from start to finish, so try your best to stick with it and become an expert in the future.
If you found this helpful, I have other similar posts like the 25 Best 3D Printer Upgrades/Improvements You Can Get Done & 8 Ways How to Speed Up Your 3D Printer Without Losing Quality so feel free to check them out and happy printing!
3d Print Designs And Files
Source: https://3dprinterly.com/how-do-you-make-3d-printer-files-step-by-step-guide-with-visuals/
Posted by: goodmanwheroulatis1952.blogspot.com
0 Response to "3d Print Designs And Files"
Post a Comment